Desktop guide
Make your own PCOC on a Linux computer with the PCOC Hike app.
You need no Bitcoin and no prior Nostr account. Linux only for now. After this, the phone guide shows how to use it on your phone.
Watch the video, or follow the short steps below.
-
Get the app and open Produce
You need a Linux computer with Flatpak set up. Download
pcoc-desktop-v0.1.8.flatpakfrom Apps. Open a terminal in the folder where you saved it and run these two lines (the same steps as on Demonstrations and in the app's README):flatpak install --user ./pcoc-desktop-v0.1.8.flatpak flatpak run app.pcoc.HikeIf the GNOME runtime is not installed yet, the install downloads it from Flathub, so it can take a few minutes.
Rebuild from source: tag
desktop-v0.1.8, apps/desktop/README.md, flatpak/build-bundle.sh. Rebuildable from the tag; not bit-reproducible.Open the app and go to Produce.
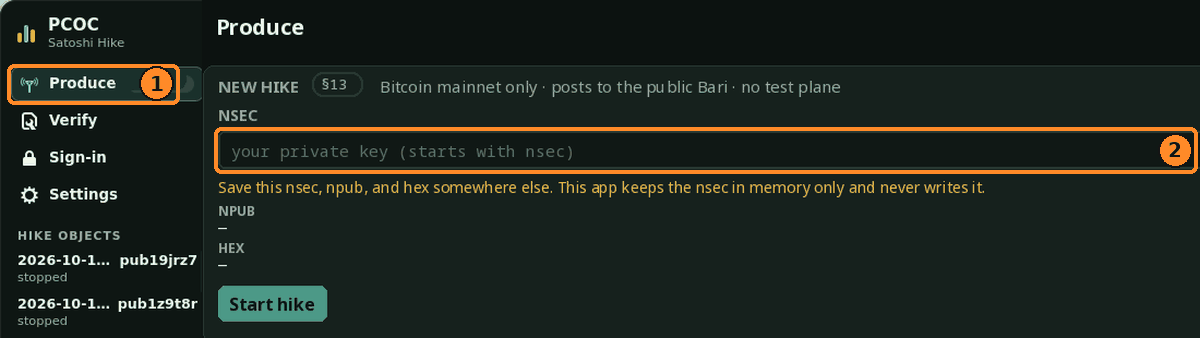
Produce (1). The NSEC field (2) is empty until you add a key. -
Make a key, or paste yours
Every PCOC belongs to a key. Press Generate to make a new one. The NSEC field fills in, along with an NPUB line.
Or paste the nsec you already use into the NSEC field. Your PCOC then belongs to the account you already use.
Your nsec stays on this computer: the app never writes it to disk and forgets it when you close the window. Keep a copy somewhere safe, such as a password manager. You need it again on the phone.

Press Generate (1), or paste your nsec into the NSEC field (2). -
Start the hike
Press Start hike. The app switches to the live view.

Start hike (1). The nsec shows as dots. -
Let it run
The making is a resource commitment: your computer holds memory the whole time, and that held memory is the cost behind your PCOC. There is nothing to buy. Bitcoin is the clock and the anchor.
It takes at least 18 Bitcoin blocks, typically around three hours or more, but it varies. The device holds about 256 MiB the whole time. The top card counts the stages, and Time left gives an estimate. You can use the computer meanwhile; leave the app open and the computer awake.
Stop hike… asks before it stops: Stop hike ends the run without making a PCOC, and Keep recording carries on.
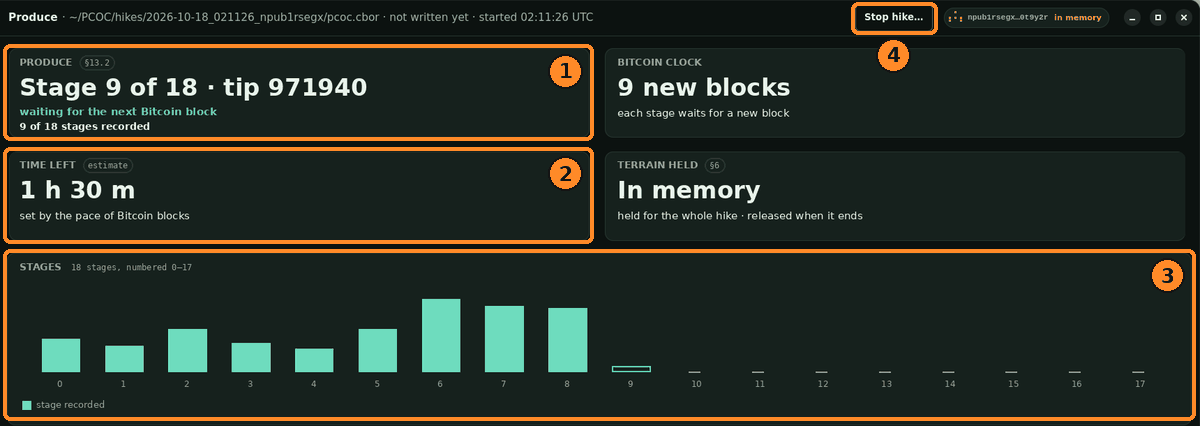
Stages recorded (1), Time left (2), the Stages bar (3), and Stop hike… (4). -
Check it
When it's done, the screen says the object was written, and the hike shows as finished in the left column. Click it any time to come back.
Press Verify this PCOC to measure it on your computer. The result lists what was checked; it does not say pass or fail. Save record keeps a copy. To check a different PCOC, press Open a PCOC… on Verify.
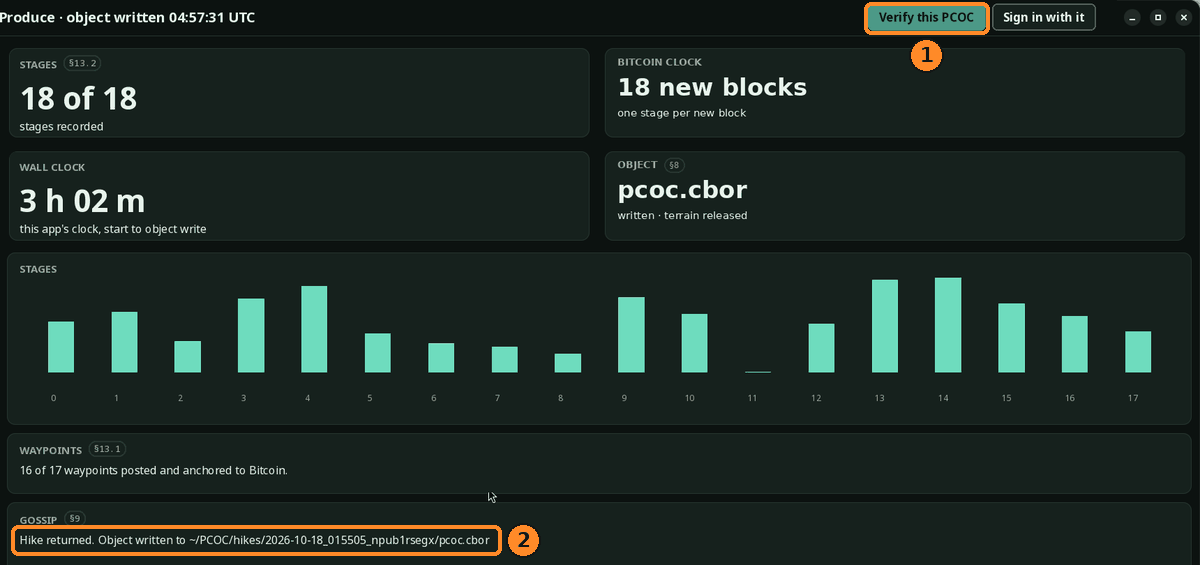
Verify this PCOC (1). The Gossip line names the saved PCOC, pcoc.cbor(2).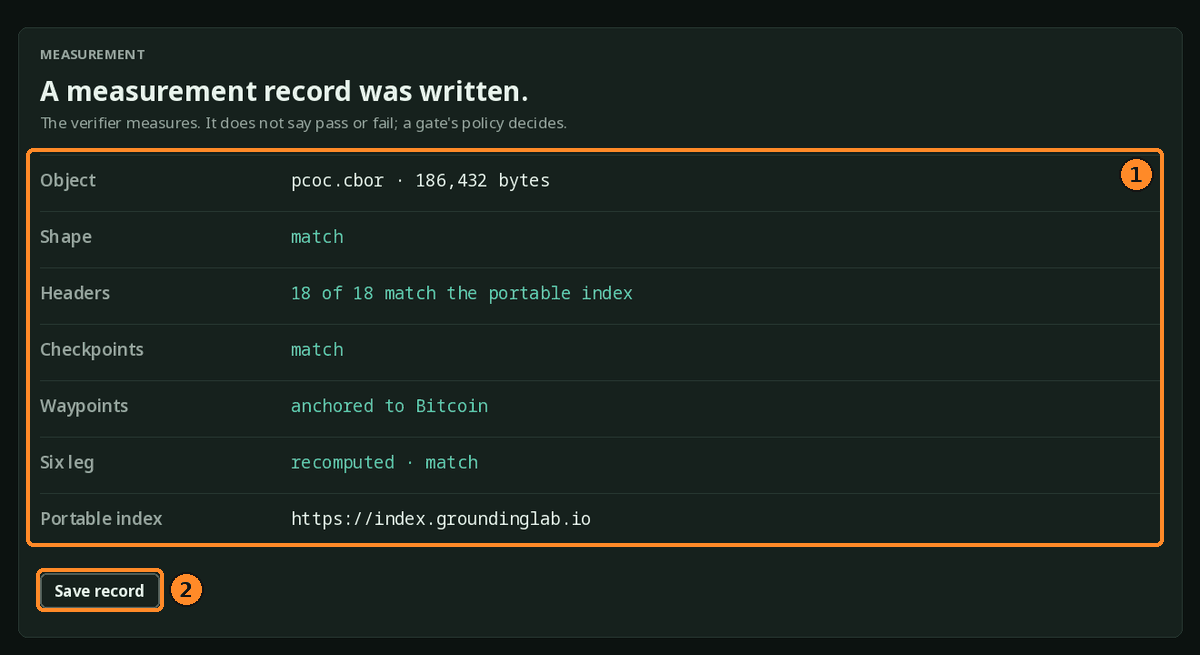
The measurement (1) and Save record (2). Or test it at the groundinglab admission gate: open Settings and press Test admission. The gate measures the PCOC; groundinglab's policy decides.
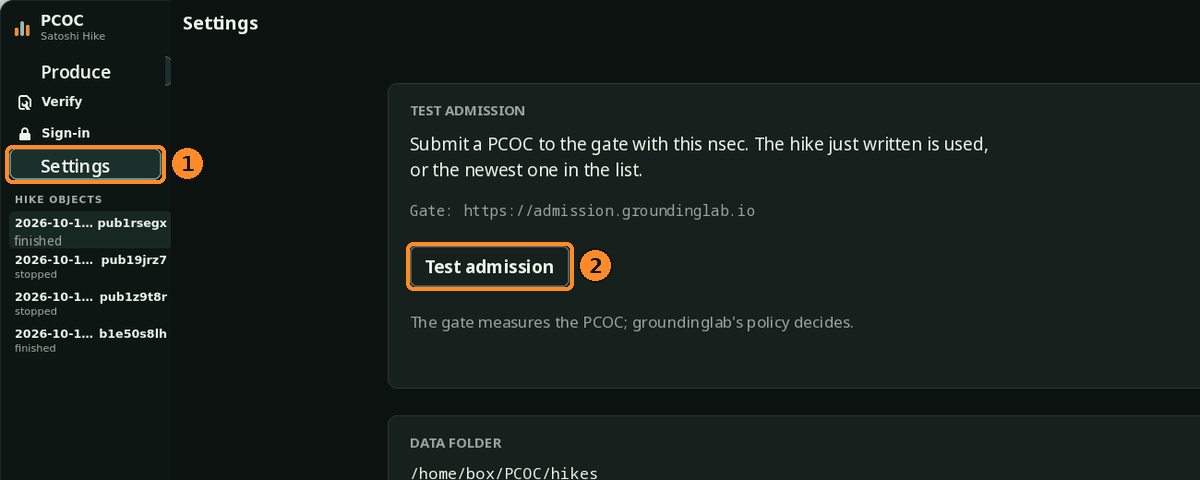
Settings (1), then Test admission (2). -
Move it to your phone
Press Send to my phone. It goes as an encrypted Nostr direct message to your own npub, through public relays. When a relay accepts it, the app says Sent to npub1… and lists the relays. If none accepts it, the app says Not sent and nothing reaches the phone; use the saved PCOC instead. On the phone, sign in to the app with this same nsec, not a remote signer.
Or save the PCOC and copy it over: the Gossip line names
pcoc.cborin your data folder (default~/PCOC/hikes).The phone guide shows the phone side.
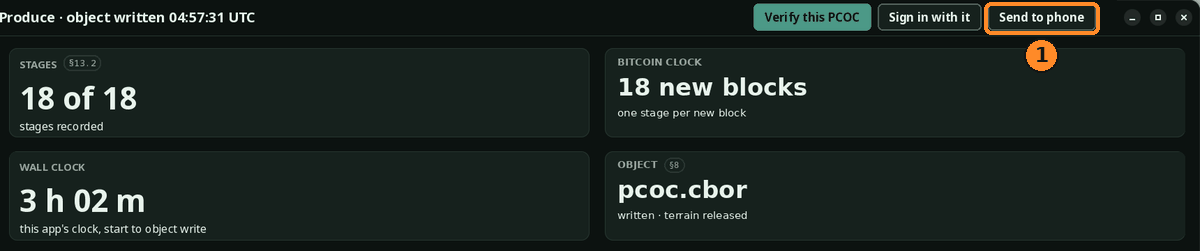
Send to my phone (1).
Also in the app. Sign in with it opens the Sign-in screen with your nsec and PCOC filled in: press Open sign-in page, start a sign-in on the website, and paste the link it gives you. Settings also sets the Data folder where hikes are saved (Choose…).
Next: your phone
Use your PCOC on Android with the phone guide. All guides are on the Help page.